
As a student, you may have heard of Facebook ads, but do you know if they can be edited? It’s a common misconception that once an ad is created, it can’t be changed. Fortunately, that’s not the case! With the right knowledge and tools, you can actually edit your Facebook ads and make sure that they’re always up-to-date and effective. In this article, we’ll explore how to edit your Facebook ads, so you can make sure you’re always getting the most out of your campaigns.
What are the Benefits of Editing Facebook Ads?
Editing Facebook Ads has some great benefits. It allows you to fine tune your ad campaigns and make sure you’re getting the most for your money. It also allows you to target specific audiences and demographics, which can lead to higher conversion rates. Furthermore, editing ads can help you save time and money by testing out different versions of the same ad to see which performs best. By editing your ads, you can also get insights into what works and what doesn’t, allowing you to make adjustments and optimize your campaigns. In short, editing Facebook Ads can be a great way to optimize your campaigns and get the most out of your ad spending.
A Guide to Editing Facebook Ads

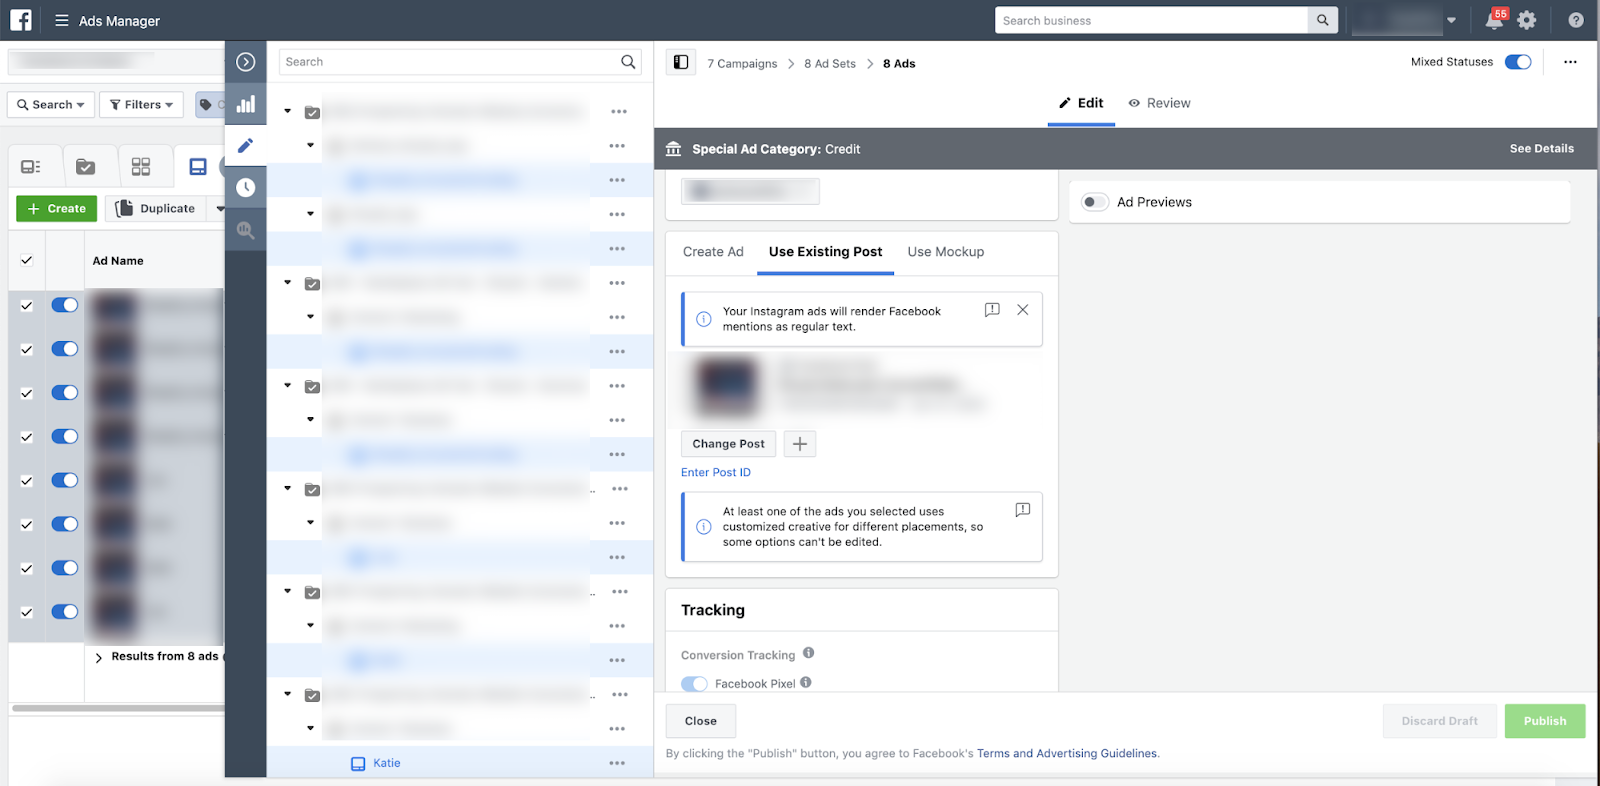
Editing your Facebook Ads can be a great way to get maximum value for your money. It’s a great way to update your content, and make sure that your ad looks as good as possible. A guide to editing your Facebook Ads can be quite helpful, as it will provide you with tips on how to make the most out of your campaign. From changing the visuals and copy to testing different CTA’s, editing your Facebook Ads can help you generate more clicks and conversions. With a few simple tweaks, you can ensure that your campaign is more effective and profitable.
How to Create an Effective Editing Process for Facebook Ads

Creating an effective editing process for Facebook Ads can be a great way to improve the performance of your campaigns. Start by understanding the ad objectives and setting clear goals. Then, create a checklist of items to review such as tone, imagery, and message. Once the ad is published, use analytics to track and analyze the performance, then edit and iterate as needed. This process can help you increase the effectiveness of your Facebook Ads and get the most out of your budget.
Tips for Optimizing Your Facebook Ads After Editing
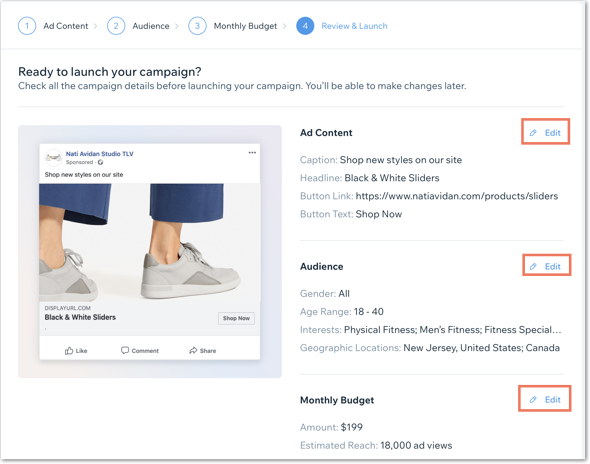
Editing your Facebook Ads can be a great way to make sure that you are getting the most out of them. Here are some tips for optimizing your Facebook Ads after editing: 1.Make sure that you are targeting the right audience for your ad. This can be done by analyzing your current audience and seeing if there are any changes that need to be made to better target your desired demographic. 2. Utilize A/B testing to compare different versions of your ad and see which one is performing better. 3. Use the insights provided by Facebook Ads to track the performance of your ad and make any necessary adjustments. 4. Track the ad’s results and adjust your budget accordingly to maximize your ROI. Following these tips can help ensure that your edited Facebook Ads are optimized and yielding the best possible results.
Troubleshooting Common Facebook Ad Editing Issues

Editing Facebook ads can be a hassle when you run into common issues. Troubleshooting them can be difficult, but there are ways to make it easier. One of the biggest problems is with the Facebook Ads Manager not allowing you to edit ads. This can happen if the ad was created in a different language or currency than the one you’re trying to edit in. To fix this, delete the ad, recreate it in the correct language and currency, and then edit it. Another issue is when you can’t upload images or videos. This can be solved by making sure the image or video meets the required dimensions for Facebook ads and is not larger than the file size limit. Lastly, if you’re having trouble with the ad not being approved, try to look at the Ad Guidelines to see what you may have missed. Following these steps can help you ensure that your ad edits go smoothly.


GIPHY App Key not set. Please check settings